After a system is selected and the scan
tool establishes communication with the vehicle, the
Function Menu displays.Now you can use Vident
iLink400 tool to diagnose vehicle,now here vident-tech will instruct
you how to use it to perform vehicle diagnose.

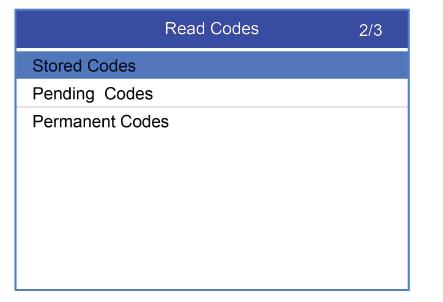
Read
Codes
Read Codes menu lets you read trouble codes
found in the control unit. Typical menu options
include:
●
Present/Permanent/Current Codes
●
History Codes
Present/Permanent/Current codes stored in a
control module are used to help identify the cause
of a trouble or troubles with a vehicle.
These codes have occurred a specific number of times and
indicate a problem that requires repair.
History codes are also referred to as past
codes that indicate intermittent DTCs that are not
currently active.
1. Select Read Codes from Function Menu and
press the OK key. A code list including code
number and its description displays.
2. Use the up and down arrow keys to scroll
through data to select lines, and left and right arrow
keys to scroll back and forth through
different screens of data.
Erase
Codes
Erase Codes menu lets you to clear all
current and stored DTCs from a selected control module.
Also it erases all temporary ECU
information, including freeze frame. Erase Codes does not fix
the problem that caused the fault! DTCs
should only be erased after correcting the condition(s)
that caused them.
1. Select Erase Codes from Function Menu
and press the OK key. Follow the ilink400
on-screen
instructions to complete the procedure.

Freeze
Frame Data
Freeze Frame Data menu displays freeze
frame data, a snapshot of critical vehicle operating
conditions automatically recorded by the
on-board computer at the time of the DTC set. It is a
good function to help determine what caused
the fault.

ECU
Information
ECU Information screen displays the
identification data of the control module under test, such as
the control module identification string
and the control module coding.
1. Select ECU Information from the menu and
press the OK key.
2. A screen with detailed information of
the selected control module displays.
Live
Data
Live Data menu lets you view and record
real time PID data from a selected vehicle electronic
control module.
Menu options typically include:
●
Complete Data List
●
Custom Data List
Complete
Data List
Complete Data List menu lets you view all
live PID data from a selected system.

1Scroll with the up and down arrow keys to
highlight a line, if the One Graphic on the bottom is
highlighted, it indicates graphing is
available for the selected line. Press the function key One
Graphic to display the PID graph.

2Press the function key Two Graphics to
display two PID graphs in one screen.

3Press the function key Merge Graph to
display two PID plots in one coordinate for easy and
intuitive diagnosis.

To record the data to memory of the scan
tool, use the function key SAVE, and press Stop
Saving to stop recording at any time.
5. Press Text to return to text viewing of
PID data.
6. Select Pause to suspend collecting data
from the scan tool and use the Start key to resume
collecting data.
7. Press the ECS key to return to the
previous menu.
Custom
Data List
Custom Data List menu lets you to minimize
the number of PIDs on the data list and focus on any
suspicious or symptom-specific data
parameters.
iLink Series Scan Tool User Manual V1.0
1. Select Custom List from the menu and
press the OK key. The custom data stream selection
screen displays. Scroll with the up and
down arrow keys to highlight a line, press the OK key
and then repeat the action to make more
selections.

2. When finished selection, use the
function key VIEW DATA to display selected items.
No comments:
Post a Comment